containerization-and-devops
Class 10 - Docker GUI Management with Portainer (Hands-on)
In this class, we covered how to install and manage Portainer, a lightweight management UI which allows you to easily manage your different Docker environments.
1. Installing Portainer
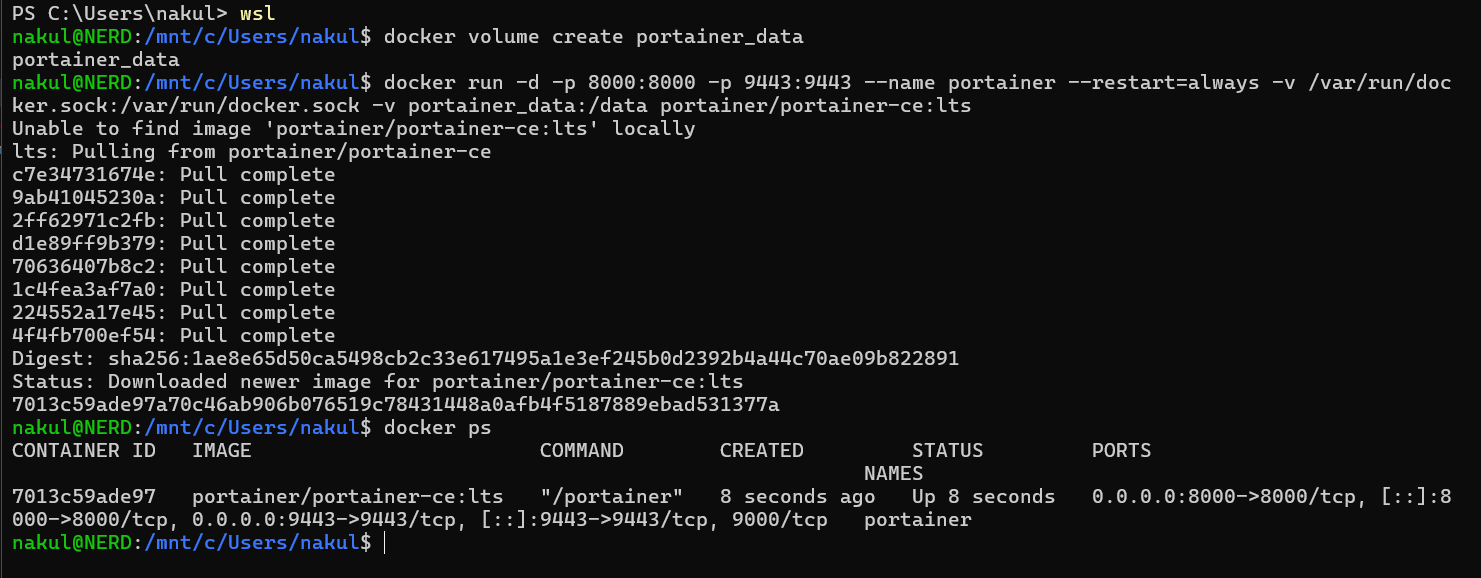
First, you need to create a volume that Portainer Server will use to store its database:
docker volume create portainer_data
Then, download and install the Portainer Server container:
docker run -d -p 8000:8000 -p 9443:9443 --name portainer \
    --restart=always \
    -v /var/run/docker.sock:/var/run/docker.sock \
    -v portainer_data:/data \
    portainer/portainer-ce:lts
Check that the container is running:
docker ps
Terminal Output
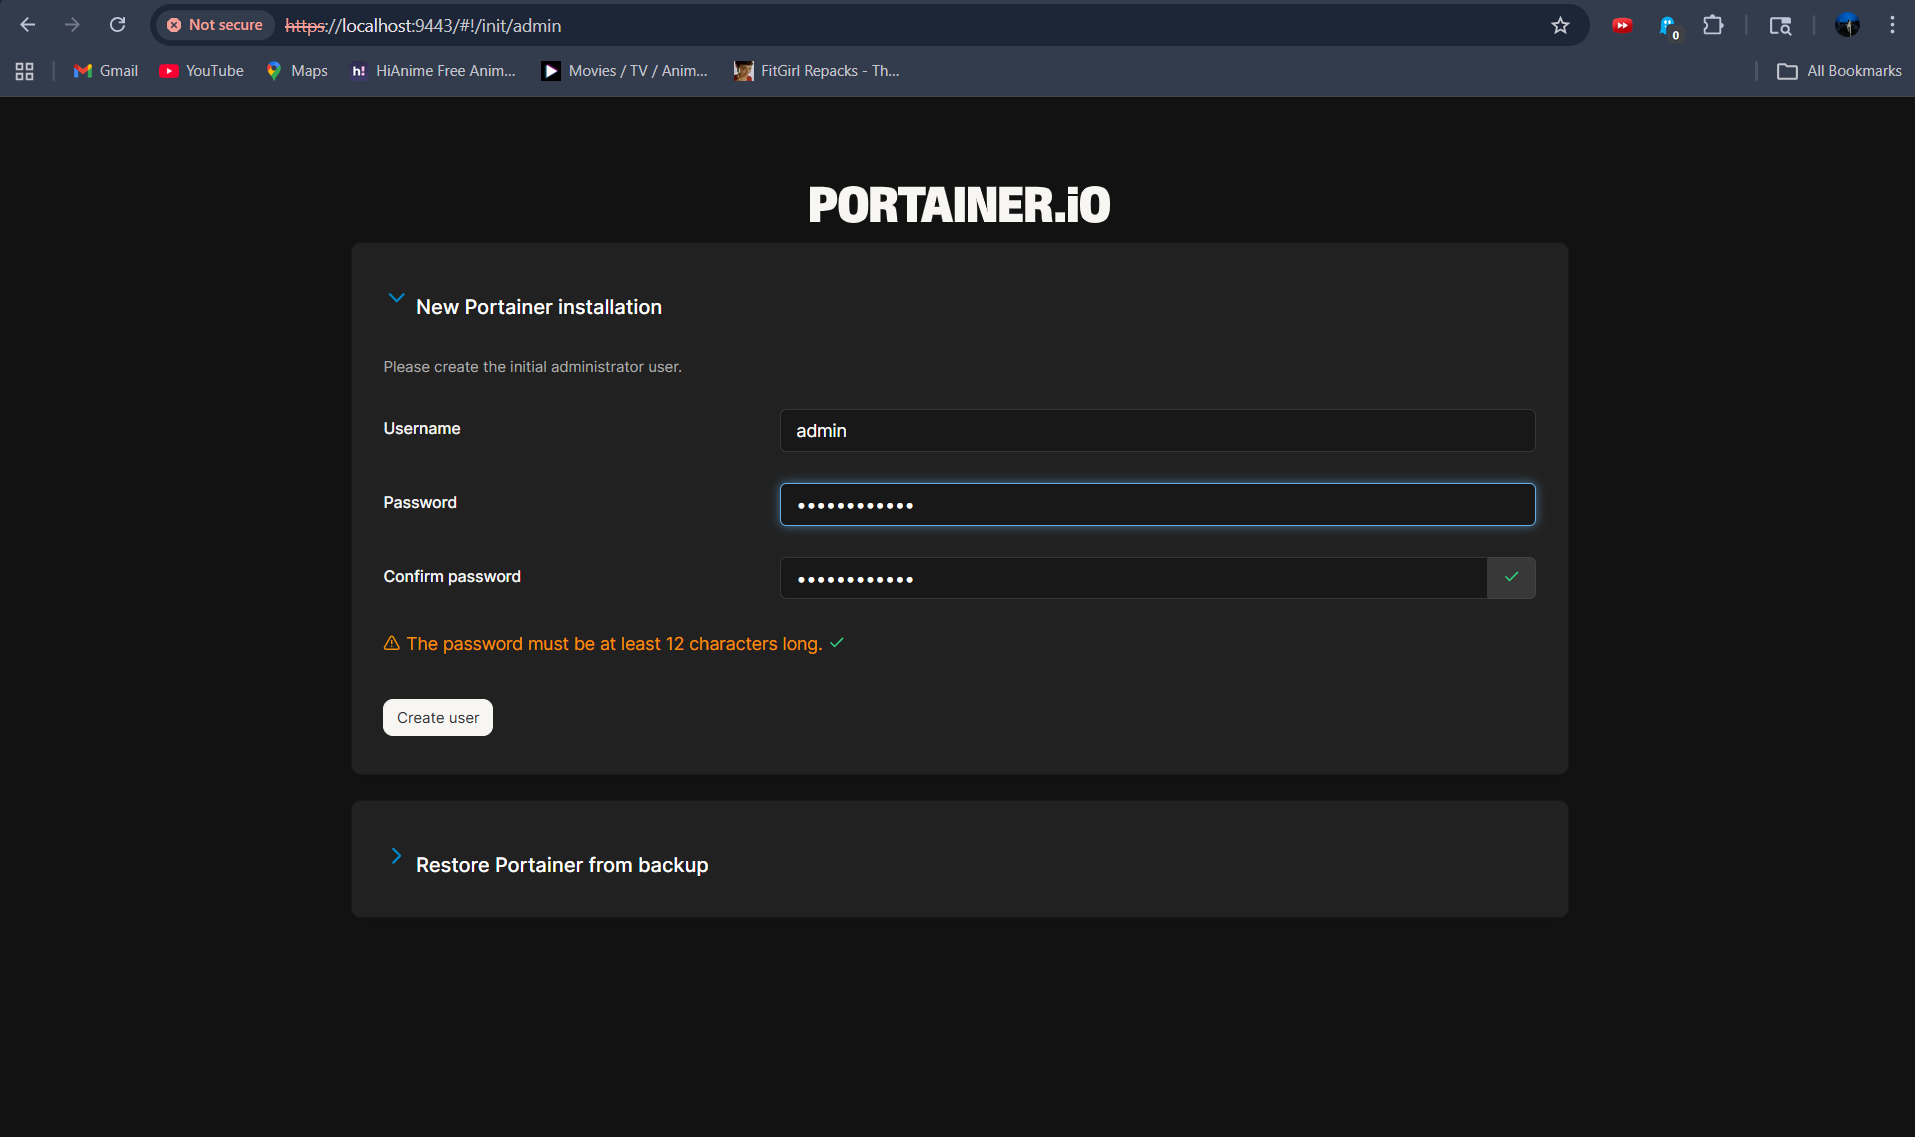
2. Accessing Portainer Web UI
After running the container, open your web browser and navigate to:
https://localhost:9443
Note: You may receive a warning about a self-signed certificate, which you can bypass for local development.
Upon your first login, you will be prompted to create the initial administrator user.

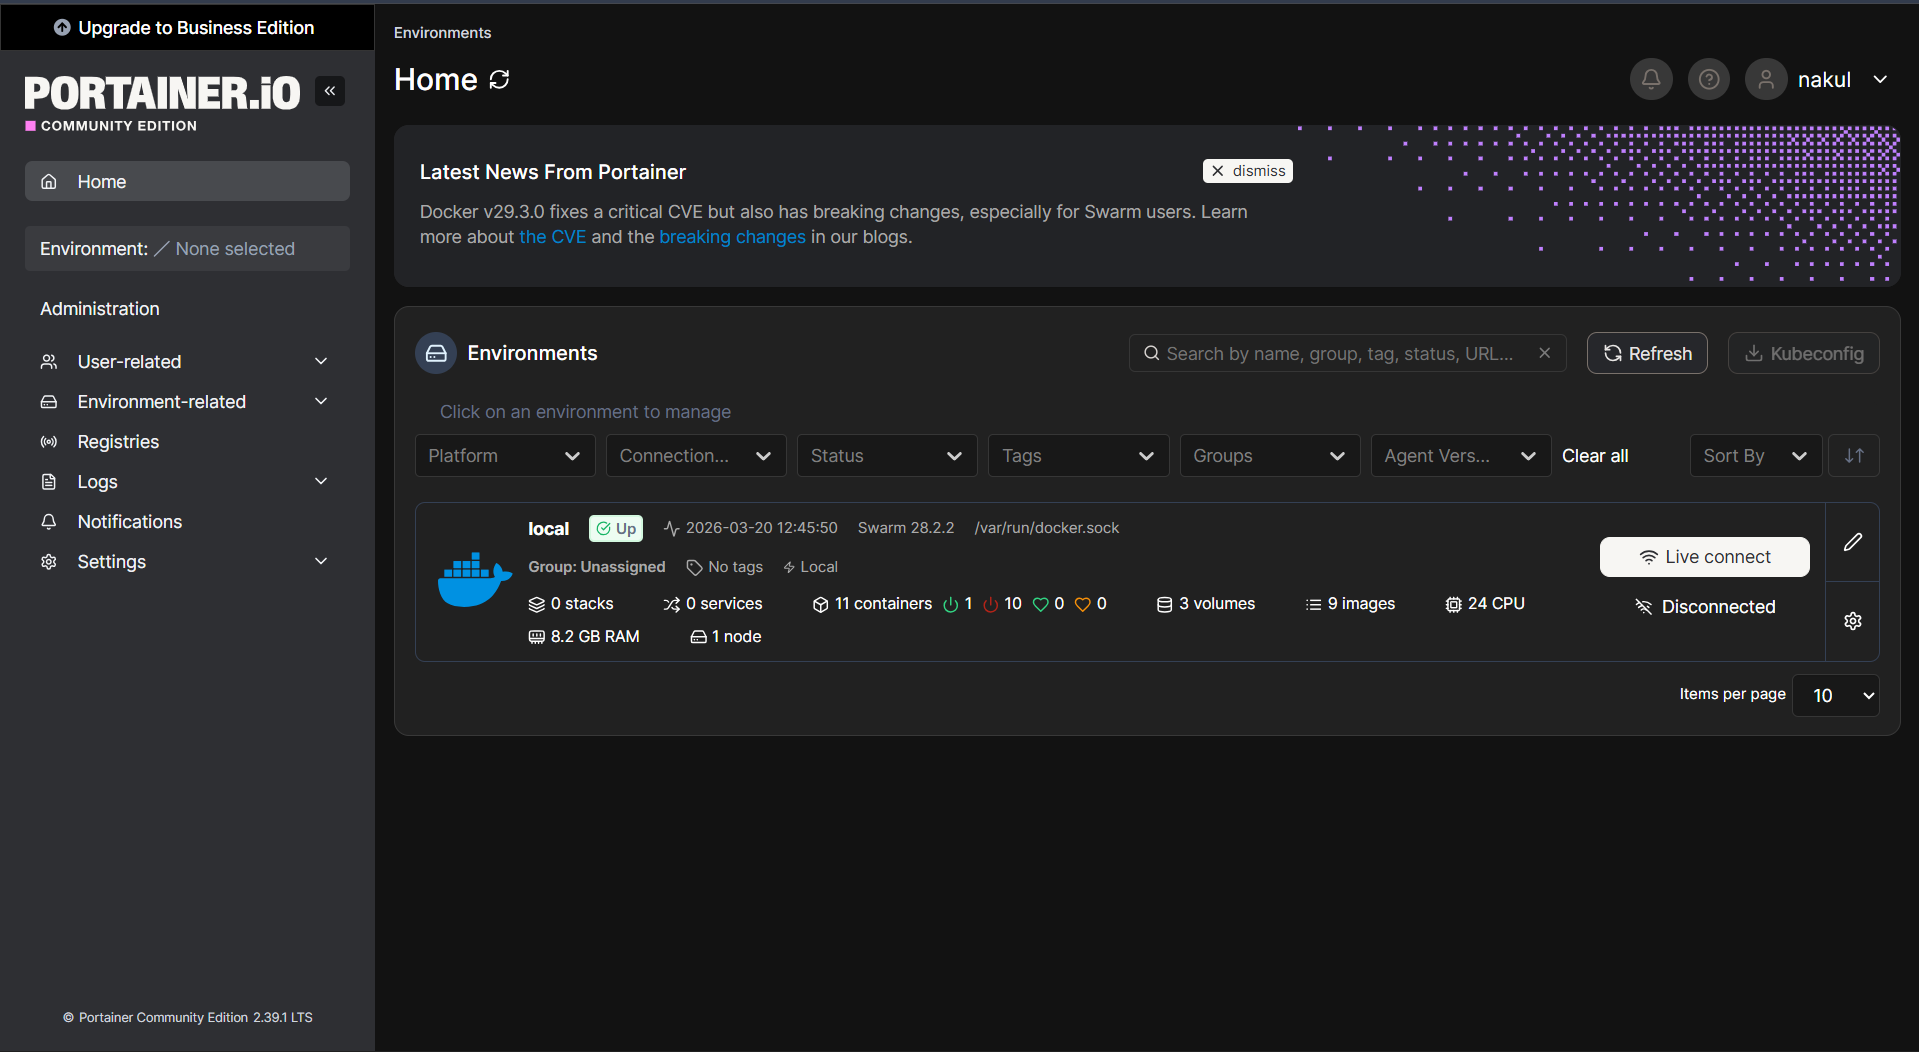
3. Portainer Dashboard
Once logged in, you can select your local Docker environment and manage containers, images, volumes, and networks directly from the UI.